I checked off another project that’s been a long time in coming with this one. This particular F-14 Tomcat is another of the machines I grew up around at my parents’ shop in Anchorage. I always wanted to get it working but didn’t have the skills, or enough information to build them, back then. As I got into working on these machines in earnest after my move to Portland, it became another project that followed me down here to join Sorcerer and 300.
Even then, it sat for quite some time. Like most of the production run for this title, it suffered from extensive damage due to playfield inserts lifting out of place. It also had mylar installed over many areas of the playfield when new, which had now been pulled up by the rising inserts and taken up art with it. The pictures below are the state I found it in after over a decade in storage.


While the playfield was rough, the machine had been stored dry. It also didn’t look to have all that many plays on it before it had been laid up in storage. The boards were pretty clean, with no battery leakage, and all of the playfield mechanisms were pretty fresh looking, if dusty.
Some time after I took possession of the machine, Buthamburg (AKA Perfect Playfields) announced they would be doing a run of reproduction playfields for F-14 on Pinside. I got myself on the waiting list and after a few months a package from Germany arrived at my office.

Several months of procrastination later (I’d claim it was to let the clearcoat cure, but I’d be lying) I cracked things open and got the old playfield and new laid out side by side.
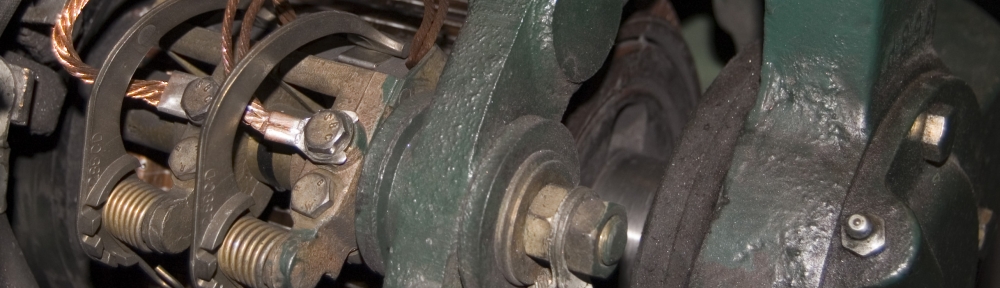
Disassembly was pretty straightforward. I took pictures of everything I could think to and still ended up with missing information. Next time I plan to take a few slow pan videos over the entire thing to get a more complete documentation of part placement and wire routing. The full gallery of pre-disassembly pictures can be found below (right click and open in new tab to view full resolution).


It took a while but I eventually got everything swapped over… While I kept the original incandescent flashers, I swapped all of the smaller bulbs over to warm white frosted non-ghosting LEDs from pinballbulbs.com, with a couple colored ones for the spots where an incandescent bulb would have had a color gel sleeve over it. I’ve been very satisfied with the results, though I’ve heard sunlight spectrum LEDs offer an even closer look to the original incandescent glow and plan to try them out on my next shop out.
A few things I did to ease the process and improve the end result were:
- Tracing brackets of each assembly before removal to record their orientation
- Replacing wood screw posts with machine screw posts mounted to new T-nuts from the underside for high impact areas, where possible
- Didn’t trust the dimpling on the new playfield. While it was close, each of these machines is hand assembled, and it came down to using my eyes on the top of the playfield while making adjustments to get the proper fit for many of the mechanisms
- Acquired some new drill bits and a nice set of pin vises for doing holes in the top of the playfield for things like wire guides

There were only two major issues I encountered after re-assembly.
The first was due to my decision to re-install the factory ground braid for several segments of the lighting. I picked up an electric staple gun to re-install it on the new playfield and found it did not have enough strength to drive the staples into the hard plywood. Worse than that though, was I ended up not being careful enough with the staples holding in the lamp sockets, and ended up with a few cases where a staple leg created a short to the barrel of the socket, resulting in blown GI fuses.
After that experience I wouldn’t re-use the braid again, nor use staples to install the sockets. Instead the next swap will include switching to the piggy back grounding with insulated wire used in other areas of the machine. Were I doing a detailed restoration where using factory style braid was non-optional, I’d find a pneumatic staple gun to do the job with less frustration. Regardless of the fasteners used, I’ll also be careful to continuity test a bit more extensively prior to first power up.
The second issue was a mysterious and very consistent air ball problem on ball launch. When you’d plunge a ball it would come flying out of the shooter lane and smack the glass much of the time, and even if it got going up the ramp would often not have enough velocity to make the orbit and enter play. I initially thought this was a wireform ramp alignment issue, and spent too long chasing that red herring… Ultimately though, it ended up being a problem of the alignment of the plunger assembly itself.

You can see in the above picture the outline of the assembly’s placement with the original playfield, and just how far I had to move it over to get the plunger centered with the lane of the new playfield. Following that adjustment, my air ball problems went away entirely.
It’s now half a year, several thousand plays, and a visit to the Portland Retro Gaming Expo later, and so far the machine has played beautifully and largely problem free after the initial shakedown period. Besides the issues noted above all I’ve had to deal with has been an occasional playfield element connection broken due to fatigue. I have seen the development of the dimpling due to ball impacts that is common to new clear coated playfields. I won’t be worrying about it too much as the game plays quite smoothly and I haven’t seen any actual finish loss, only what I’d consider normal wear, but it’s worth noting for those it bothers.
You can view the rest of the post-swap pictures of the machine below (right click and open in new tab to view full resolution). A thread full of others’ experiences with swapping in this particular run of reproduction playfields can also be found on Pinside here.


